A2UI Surface における MCP Apps 統合
このガイドでは、Model Context Protocol (MCP) Applications が A2UI surface 内にどのように統合され、表示されるかを、セキュリティモデルとテストガイドラインとともに説明します。
NOTE: 中核となる A2UI-over-MCP プロトコルを探している場合は、MCP tool call から A2UI JSON payload を返す方法を説明した A2UI over MCP を参照してください。
概要
Model Context Protocol(MCP) は、MCP サーバーがリッチでインタラクティブな HTML ベースのユーザーインターフェースを host に届けられるようにします。A2UI は、こうしたサードパーティアプリケーションを実行するための安全な環境を提供します。
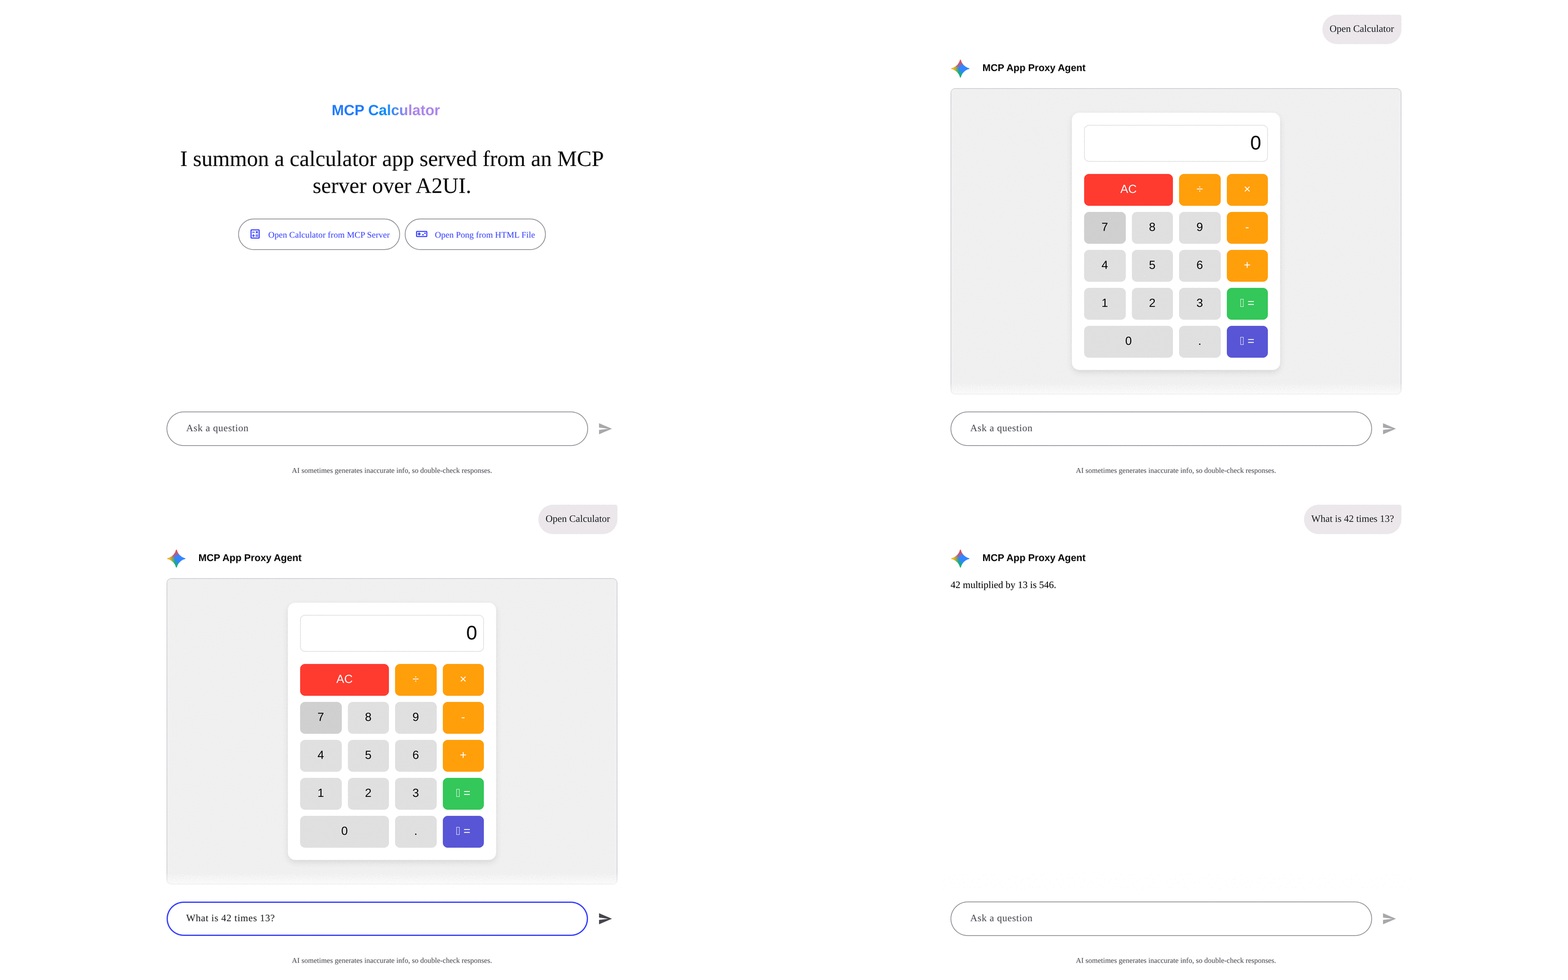
Double-Iframe 分離パターン
信頼できないサードパーティコードを安全に実行するために、A2UI は double-iframe 分離パターンを利用します。この方式は、構造化された JSON-RPC チャネルを維持しながら、raw DOM injection をメインアプリケーションから隔離します。
セキュリティ上の理由
allow-scripts を使った標準的な single-iframe sandboxing は、allow-same-origin と組み合わせるとしばしば回避され、コンテナ化が無効化されます。allow-scripts と allow-same-origin の両方を持つ iframe は、親 DOM とプログラム的にやり取りしたり、自身の sandbox 属性を削除したりすることで sandbox を脱出できます。
これを防ぐため、A2UI はサードパーティアプリケーションが実行される inner iframe で allow-same-origin を厳格に除外します。
アーキテクチャ
- Sandbox Proxy (
sandbox.html): 同一 origin から提供される中間iframeです。構造化された JSON-RPC チャネルを維持しながら、raw DOM injection をメインアプリから分離します。- 権限: host template では sandbox しないでください。例:
mcp-app.tsまたはmcp-apps-component.ts。 - Host origin 検証: メッセージが期待される host origin から来ていることを検証します。
- 権限: host template では sandbox しないでください。例:
- Embedded App(Inner Iframe): 最も内側の
iframeです。制限された権限でsrcdocにより動的に注入されます。- 権限:
sandbox="allow-scripts allow-forms allow-popups allow-modals"(allow-same-originは絶対に含めないでください)。 - 分離: unique origin により、
localStorage、sessionStorage、IndexedDB、cookies へのアクセスがなくなります。
- 権限:
物理的な Iframe のネスト
flowchart TD
    subgraph "Host Application"
        A[A2UI Page] --> B["Host Component e.g., McpApp"]
    end
    subgraph "Sandbox Proxy"
        B -->|Message Relay| C[iframe sandbox.html]
    end
    subgraph "Embedded App"
        C -->|Dynamic Injection| D[inner iframe untrusted content]
    end
End-to-End アーキテクチャと Lifecycle Flow
完全なサイクルには、layout tree 階層、完全に分離された backend actor(Proxy Agent と MCP Server)、そして分離されたサードパーティウィジェットが native sibling(例: Pong ゲームの scoreboard)と反応的に相互作用する方法が含まれます。
graph TD
    %% 1. Top Tier (Strict vertical hierarchy)
    MCPServer["MCP App Server<br/>(Hosts widget resources & core tools)"]

    %% 2. Middle-Top Tier
    Agent["AI Agent<br/>(A2UI Backend Coordinator)"]

    %% 3. Subgraph for Host layout tree (Bottom Tier)
    subgraph HostApp ["Host Application"]
        direction TB
        Shell["A2UI Rendering Engine & State Manager<br/>(Orchestrates native layout & state bindings)"]

        subgraph LayoutTree ["A2UI Component Tree"]
            McpComponent["McpApp Component<br/>(Sandboxed HTML/JS Widget)"]
            SiblingComponent["Other A2UI Components<br/>(e.g., PongScoreBoard)"]
        end

        Shell <-->|"1. Initialize postMessage Event Bridge"| McpComponent
        Shell -.->|"5. Reactive State Update<br/>(e.g., Render updated score)"| SiblingComponent
    end

    %% Vertical Channel connecting Top to Middle-Top
    MCPServer ==>|"MCP Protocol (SSE / Stdio)"| Agent

    %% Unidirectional Data Cycle (Flowing vertically through the center)
    McpComponent ==>|"2. Tool Action Request<br/>(e.g., score_update)"| Shell
    Shell ==>|"3. Action Delegation (A2UI Protocol)"| Agent
    Agent ==>|"4. State Mutation & Sync (dataModelUpdate)"| Shell

    %% Style Sibling Relationship
    McpComponent -.->|"No Direct Access (Strictly Isolated)"| SiblingComponent
Sibling Update Loop の仕組み
- postMessage イベントブリッジの初期化(1): host shell が double-iframe sandbox をインスタンス化し、
McpAppコンポーネントとの安全な message relay bridge を確立します。 - Tool Action Request(2): ユーザーが sandboxed app と操作すると(例: Pong ゲームで得点する)、app は postMessage bridge 経由でメッセージを post し、tool action をトリガーします。
- Action Delegation(3): host layout engine が action をインターセプトし、A2UI/A2A プロトコルを介して
AI Proxy Agentに実行を委任します。外部計算やリソースが必要な場合、agent は標準 MCP Protocol(SSE / Stdio)を使ってMCP App Serverと任意に連携します。 - 状態変更と同期(4): agent が action を処理し、master session state を変更し、
dataModelUpdateを host state manager へ push します。 - Reactive State Update(5): host がローカル store を更新し、その state path にバインドされた sibling A2UI コンポーネント(例: native scoreboard や display)の反応的更新をトリガーします。sandboxed コンポーネントと native sibling 要素の直接通信は、コンテナ化セキュリティを維持するため厳格にブロックされます。
使用方法 / コード例
MCP Apps コンポーネントは通常、A2UI カタログの custom ノードとして解決されます。開発者がコードで使う例を示します。
1. カタログ内に登録する
コンポーネントをアプリケーションカタログに登録する必要があります。たとえば Angular では次のようになります。
import {Catalog} from '@a2ui/angular';
import {inputBinding} from '@angular/core';

export const DEMO_CATALOG = {
  McpApp: {
    type: () => import('./mcp-app').then(r => r.McpApp),
    bindings: ({properties}) => [
      inputBinding(
        'content',
        () => ('content' in properties && properties['content']) || undefined,
      ),
      inputBinding('title', () => ('title' in properties && properties['title']) || undefined),
    ],
  },
} as Catalog;
2. A2UI メッセージ内で使用する
Host または Agent の context で、この custom node に変換される A2UI メッセージを送信します。
{
  "type": "custom",
  "name": "McpApp",
  "properties": {
    "content": "<h1>Hello, World!</h1>",
    "title": "My MCP App"
  }
}
content が複雑、またはエンコードが必要な場合は、URL-encoded 文字列を渡せます。
{
  "type": "custom",
  "name": "McpApp",
  "properties": {
    "content": "url_encoded:%3Ch1%3EHello%2C%20World!%3C%2Fh1%3E",
    "title": "My MCP App"
  }
}
通信プロトコル
Host と embedded inner iframe の間の通信は、postMessage 上の構造化された JSON-RPC チャネルで行われます。
- Events: Host Component は proxy からの
SANDBOX_PROXY_READY_METHODメッセージを待ち受けます。 - Bridging:
AppBridgeが message relay を処理します。開発者、特に信頼されない iframe 内の MCP App Developer は、bridge.callTool()を使って MCP server の tool を呼び出せます。 - The Host: コールバックを解決します(例: 特定の resizing、Tool results)。
制限事項
最も内側の iframe では allow-same-origin が厳格に省略されるため、次の条件が適用されます。
- MCP app は
localStorage、sessionStorage、IndexedDB、cookies を使用できません。各アプリケーションは unique origin で実行されます。 - parent による直接 DOM 操作はブロックされます。すべての相互作用は message passing を通じて行う必要があります。
前提条件
サンプルを実行するには、次がインストールされていることを確認してください。
- Python 3.10+ — agent と MCP server backend に必要
- uv — 高速な Python パッケージマネージャー(すべての Python サンプルの実行に使用)
- Node.js 18+ と npm — client app のビルドと実行に必要
GEMINI_API_KEY— すべての ADK ベース agent に必要。Google AI Studio で取得できます。
⚠️ 環境変数の設定: shell で
GEMINI_API_KEYを export するか、各 agent ディレクトリに.envファイルを作成できます。agent はdotenvを使って.envファイルを自動読み込みします。
サンプル
MCP Apps 統合を示す主要なサンプルは 2 つあります。各サンプルでは 複数のターミナル が必要です。backend service ごとに 1 つ、client 用に 1 つ使用します。
サンプル 1: MCP App Standalone Sample(Lit Client & ADK Agent)
このサンプルは、Lit ベース client と ADK ベース A2A agent で sandbox を検証します。
Step 1: Agent を起動する
別のターミナルで agent ディレクトリに移動し、agent を起動します。
agent は http://localhost:8000 で実行されます。
Step 2: Client を起動する
新しいターミナルで client ディレクトリに移動し、dev server を起動します(Lit renderer を先にビルドする必要があります)。
client は http://localhost:5173/ で起動します。
Step 3: ブラウザで開く
ブラウザを開き、http://localhost:5173/ に移動します。MCP App を読み込む A2UI インターフェースが表示されるはずです。
期待される結果: sandboxed iframe 内で MCP App を読み込むページです。iframe 内の "Call Agent Tool" ボタンをクリックすると、agent が処理する action がトリガーされます。
サンプル 2: MCP Apps(電卓 + Pong)(Angular クライアント + MCP Server + Proxy Agent)
このサンプルは、Angular ベース client、MCP Proxy Agent、リモート MCP Server で sandbox を検証します。3 つの backend process が必要です。
Step 1: MCP Server(Calculator) を起動する
MCP server は SSE transport を使って http://localhost:8000 で起動します。
Step 2: MCP Apps Proxy Agent を起動する
新しいターミナルで次を実行します。
proxy agent はデフォルトで http://localhost:10006 で起動します。
Step 3: Angular Client をビルドして起動する
新しいターミナルで次を実行します。
cd samples/client/angular/

# Build the renderers (required — Angular depends on local renderer packages)
npm run build:renderer

npm install --include=dev
npm run build:sandbox
npm start -- mcp_calculator
⚠️
--include=devが必要です: Angular CLI(@angular/cli) は dev dependency です。--include=devがないとng serveを利用できません。⚠️
build:rendererとbuild:sandboxはどちらも必要です:build:rendererは Angular app が依存する A2UI renderer package をコンパイルします。build:sandboxは sandbox proxy を Angular プロジェクトの public assets にバンドルします。どちらかが欠けると app は動作しません。
client は http://localhost:4200/ で起動します。
Step 4: ブラウザで開く
次へ移動します。
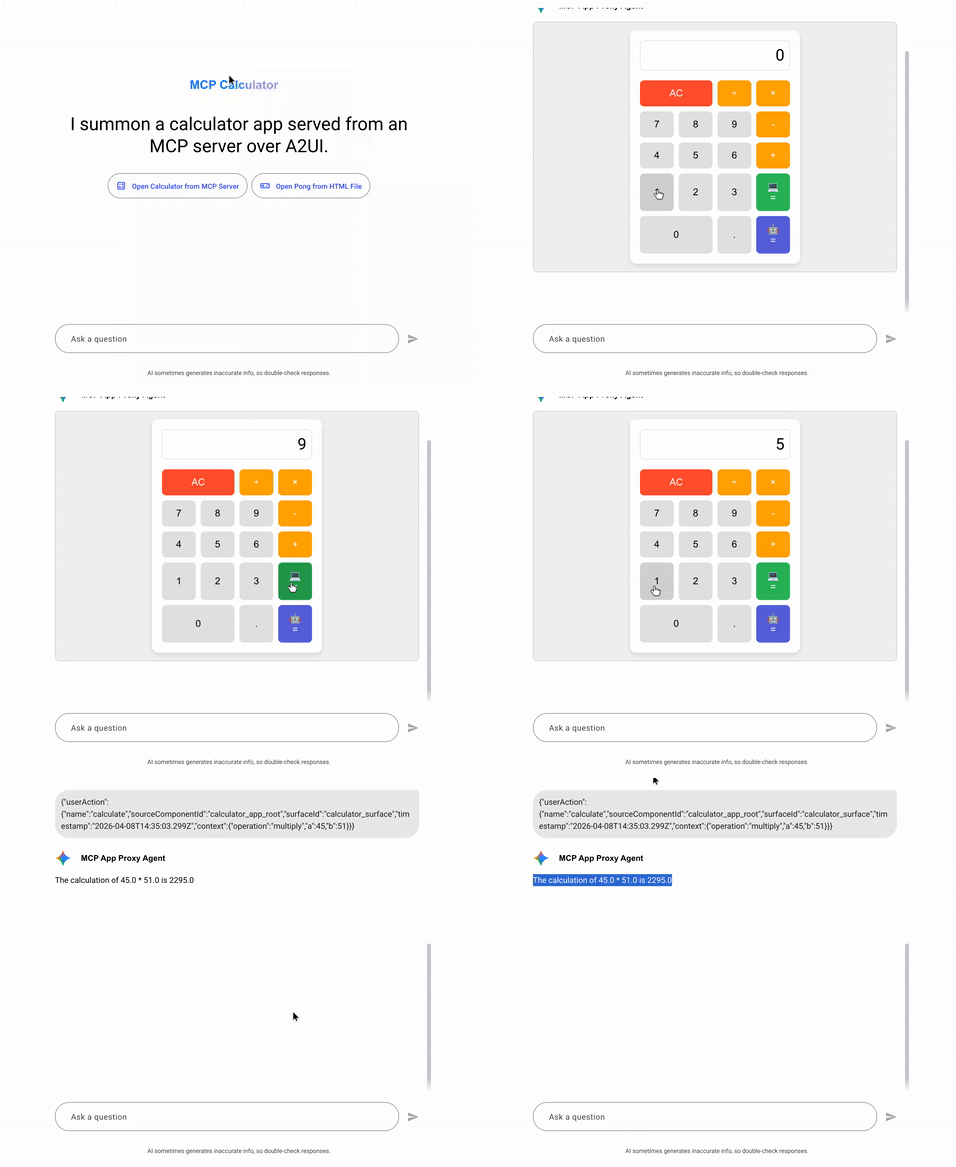
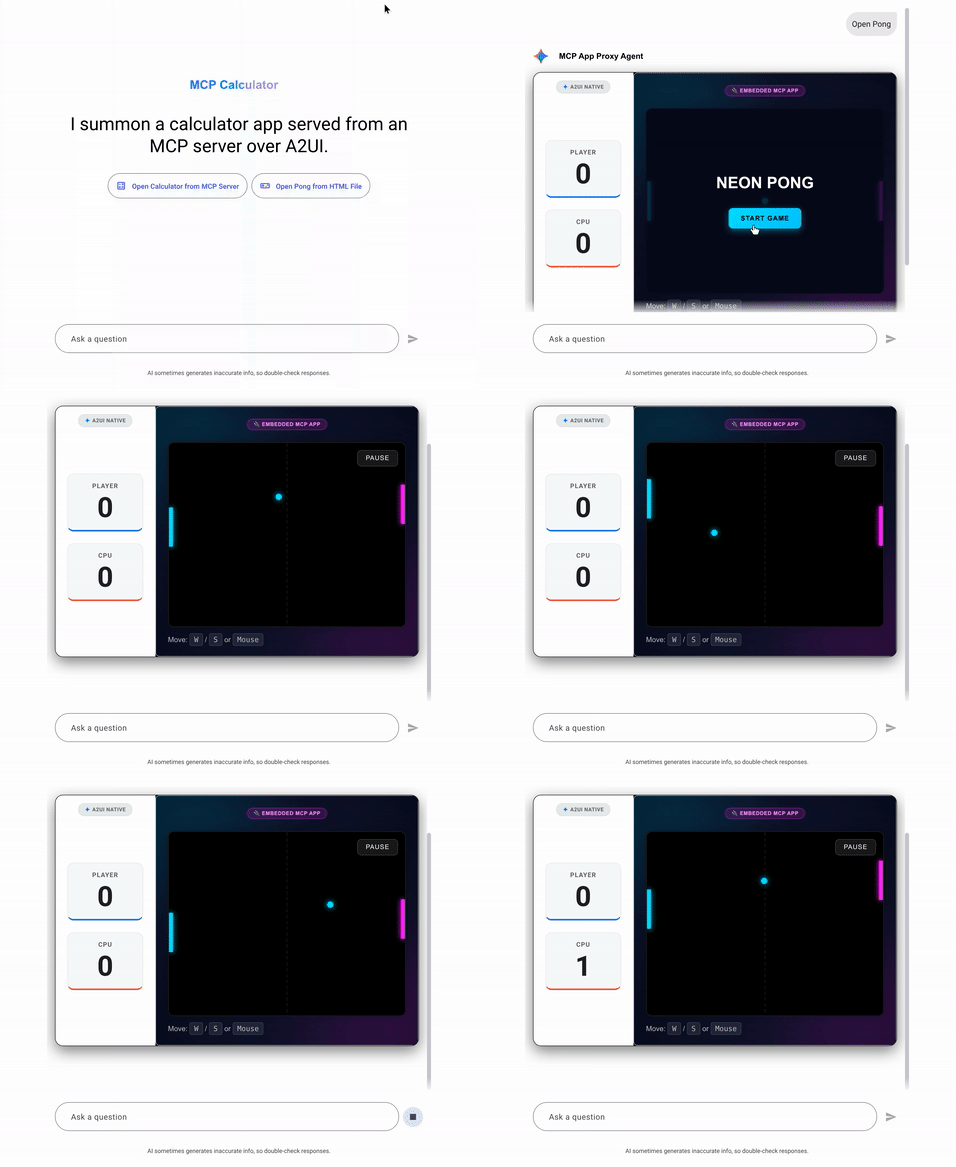
期待される結果: calculator app または pong app を読み込む smart chip のセットがレンダリングされます。どちらの app も、それぞれの sandboxed iframe 内で実行されます。
| Calculator App | Pong App |
|---|---|
 |
 |
テスト用 URL オプション
テスト目的で、特定の URL query parameter を使って security self-test を opt-out できます。
disable_security_self_test=true
この query parameter により、iframe 分離を検証する security self-test をバイパスできます。double-iframe 設定が厳格な origin check を通過しない可能性があるデバッグやテスト環境(例: localhost 開発)で便利です。
使用例:
トラブルシューティング
| 問題 | 解決方法 |
|---|---|
GEMINI_API_KEY environment variable not set |
キーを export するか、agent ディレクトリに .env ファイルを追加します。 |
contact_lookup agent の Python version error |
Python 3.13+ をインストールします(そのサンプルの pyproject.toml で必要)。 |
npm run build:renderer fails |
先に samples/client/lit/ で npm install を実行したことを確認します。 |
| Angular client shows blank page | npm start の前に npm run build:sandbox を実行したことを確認します。 |
| MCP app iframe doesn't load | MCP server(port 8000) と proxy agent(port 10006) の両方が実行中であることを確認します。 |
ng serve not found |
npm install --include=dev を実行して、@angular/cli を含む dev dependency をインストールします。 |
| "URL with hostname not allowed" | Angular 21 は許可 host を制限します。デフォルトの localhost を使い、--host 0.0.0.0 は渡さないでください。 |
| Security self-test fails in dev | URL に ?disable_security_self_test=true を追加します。 |